diapers.com discounts
use code:MELI9005
New Customers Only. Restrictions apply.
baby items
diapers.combuy baby items at diapers.com
Showing posts with label nursery. Show all posts

Wednesday, February 16, 2011

DIY No-Sew Curtains

I found an inspiring tutorial over at Young House Love for some fabulous DIY no-sew curtains. After agonizing over curtain choices online, I decided to save some money and make my own.

For most of the project, all I used was an iron, some iron-on hem tape, and scissors. I found some cute polka-dot fabric that's exactly like some Pottery Barn Kids curtain panels I had my eye on. The great thing is, the PBK curtains would have cost me $100, and I only spent $20 on the fabric.

I have to admit...I DID cheat and sew a little, only because I wanted the top of the curtains to look like the curtains that are currently in the nursery. I could have done this with 2 rows of hem tape, but I figured sewing 2 straight lines would be faster. Here's the old curtain:


For the top of my curtains, I first finished off the edge with hem tape like the tutorial said, then I folded it down 4 inches and ironed it. To make the rod pocket, I sewed a seam 1 1/2" from the edge, and then another seam 2" below that. Here is my finished product:


We don't get direct sunlight through this window, so I probably won't need to add blackout liners. The blinds are faux-wood blinds from Lowe's ($20 less than the same blinds at Home Depot!).

Saturday, February 5, 2011

Nursery Update 2/5/11--DIY Kids Bookshelves

My husband and I were in search of cheap, compact storage solutions for the nursery, and we also needed to clear out half of our office so we could have space for our little guy. The solution: clear off a cheap bookshelf we already own, cut it in half, paint it, and add baskets for storage.

Before: (a $25 bookshelf from Big Lots)

Unfortunately, it didn't occur to me to take pictures until my husband was done. He was able to cut perfectly straight lines through the bookshelf using his favorite new toy, the Fein MultiMaster. This tool is pretty incredible and he's been able to use it for several jobs already. It's a handheld tool and you swap out the attachments so you can do different jobs like cutting, sanding, etc.

Ok, moving on...

Most of the shelves on the bookshelf are adjustable, but my husband did have to drill a couple new holes to get the shelves on the two bookshelves to line up with each other.

The next part is where I took over. I painted the shelves a shade of white called Popped Corn to match my restored dresser. I painted the inside back of the bookshelves blue just for fun. I'm not sold on the blue now that the baskets are in, so I may end up painting them all white instead. Then my husband caulked around the inside since the backboard is cheap and flimsy and the paint was starting to separate. He also sprayed a clear sealant on the shelves. Here are the bookshelves after painting (the light kept reflecting off the blue and makes it look splotchy...sorry).


I wanted to add dark brown elements to match our espresso crib, so I found these Burlington Small Espresso Willow Baskets on Amazon and bought 8 of them - 4 with light blue liners, and 4 with sage liners. The liners have a sweet gingham pattern that makes them perfect for a nursery! The baskets are 10" x 10" and I think this will add a lot more storage. (Did I mention the closet in the nursery is completely full so we have no space for baby stuff in there?) I really have no idea what I will use these basket for yet--burp cloths, diapers, toys...any suggestions? What are some things that I should have easily accessible?

Here is the finished product:

Sunday, January 30, 2011

Nursery Update 1/30/11

Our crib, mattress, mattress pad, and bedding have arrived! I love it! Here's the crib all set up. My bedding is the Carter's Forest Friends 4 Piece Crib Bedding Set.


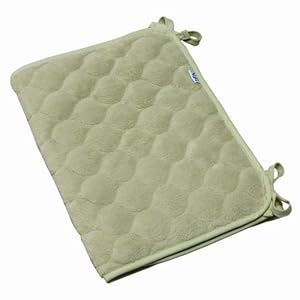
We found that the sheet is impossible to put on with the bumper in place, though, so it will be hard to change out the bedding if he has a diaper blowout. I've decided to register for some sheet savers in sage and blue from Amazon. You just tie them to the crib rails and then you don't have to change the sheets every time baby makes a mess--brilliant!


Thursday, January 20, 2011

Results!!

I got my initial amnio results back. My test was negative for Trisomy 18! I am so relieved. These results are 96% accurate, and I will hear the full results in about a week, but I feel confident in moving forward with nursery preparations. I can't stop looking at the ultrasound pictures from Tuesday. Our little boy has the cutest little profile! I will add new pictures soon.

To make my day even better, our crib arrived today, and the crib bedding should be here tomorrow! I am not letting myself spend any more money on the baby this month, though, lol.

Today I checked out a book from the library called My Teacher's Having a Baby. I think I'm going to tell my class tomorrow! Yikes! I'm so paranoid that once I tell them, something will go wrong and then I will have to explain to 26 first graders why I'm not having a baby after all...

Sunday, January 9, 2011

Crib bedding

I decided on my crib bedding for the nursery! It's Carter's Forest Friends bedding set. We're going to do tan walls with accents of sage green, baby blue, and chocolate brown throughout the room. I can't wait!

Thursday, July 8, 2010

Cart-Before-Horse Confession: Nursery Dresser

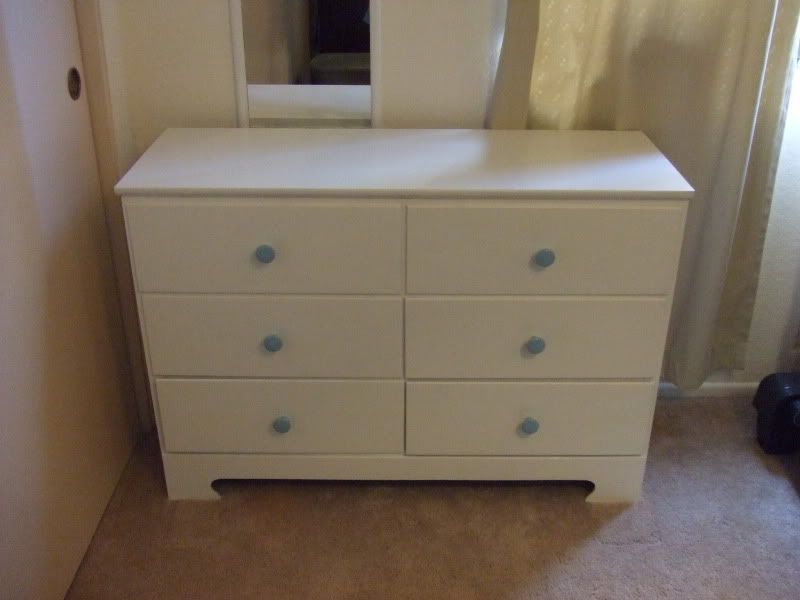
My first project of the summer is completed. I repaired and repainted my childhood dresser to use in my future nursery! We are also going to use MH's crib that his mom and grandfather made for him before he was born. I'm going to start unpacking my closet and storing all the random baby clothes and books I've collected in the dresser. I'm planning to use the dresser as a changing table. I also painted the mirror behind it to match.

MH strongly believes in "the power of positive thinking" and he thinks if we start preparing for a baby it will happen for us. I'm not as optimistic as he is with the "if you build it, they will come" philosophy, but I'm happy to have this project done at least.


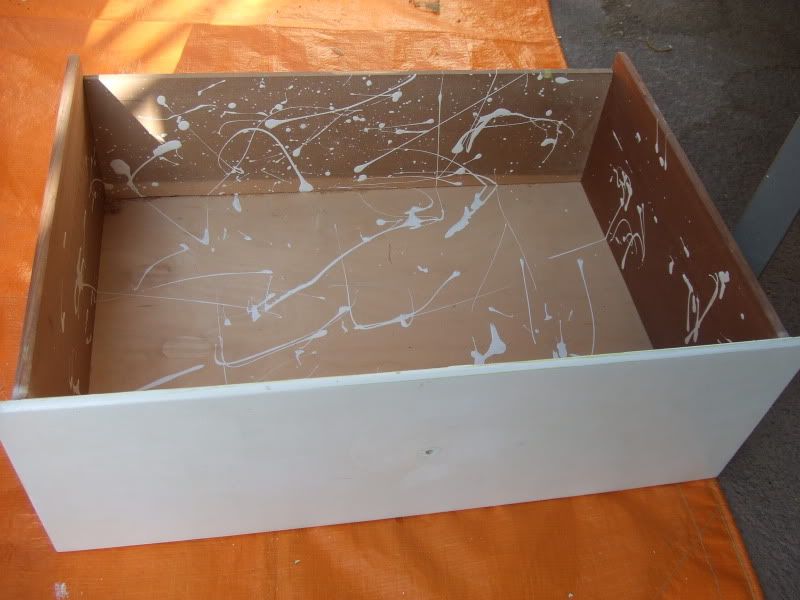
Ok, so it's not completely done. The insides of the drawers currently look like this:


Apparently when I was a teenage I thought this would make them look "cool." Clearly I was not meant to have a career in design. I plan to line the drawers with cute contact paper once I have a theme for the nursery.
Related Posts with Thumbnails